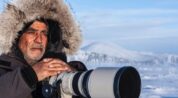
Capturing Winter Light: Natural Illumination and Shadow Play in High-Latitude Cinema
The Lure of the Sub-Zero Horizon
High-latitude cinema begins with a different understanding of daylight. In northern winter, the sun may skim the edge of the world rather than climb decisively overhead, turning snowfields into luminous planes and faces into landscapes of alternating warmth and shadow. The image is not simply dark or bright. It is layered with pale gold, blue ambient light, silver haze, and long, delicate shadows that move almost imperceptibly across the frame.
That condition creates a productive paradox for independent filmmakers. A major production might respond to winter darkness with trucks of HMIs, generators, cranes, diffusion, and extensive rigging. A small crew can instead treat the environment as an enormous lighting instrument. With careful scouting, exposure discipline, and a few lightweight modifiers, the low sun, reflective snow, and lingering twilight can create images that feel more specific than an engineered approximation. The constraints are not merely logistical obstacles. They are the beginning of a visual language with a clear northern accent.
Perpetual Golden Hour and Grazing Solar Angles
At high latitudes, the winter sun travels a shallow arc across the sky. Even when it rises above the horizon, it may remain low enough to cast light laterally through trees, across ridgelines, and along the contours of a performer”s face. The familiar golden hour is therefore extended into a broader working condition. The light changes, but it does not rush through the same abrupt transitions experienced closer to the equator.
This grazing illumination is particularly valuable for close-ups. A face turned slightly toward the sun can receive a narrow strip of brightness across the cheekbone, brow, and jaw, while the opposite side falls into cool shadow. The result supplies modeling without a traditional key light. Fine textures become legible: frost on eyelashes, wind-reddened skin, wool fibers, weathered timber, and the grain of an old snowmobile track. Guidance on direct sunlight often recommends diffusion, shade, reflectors, or deliberately embracing high contrast, and the same principles apply to moving-image work. The difference is that a cinematographer can build a sequence around the direction and duration of this light.
Camera orientation becomes more important than brute-force illumination. Shooting directly toward the low sun can produce flare, veiling glare, and a fragile silhouette, while turning a few degrees away may preserve texture and maintain a bright edge on the subject. A lens hood, matte box, or carefully positioned flag can control unwanted flare without eliminating the source altogether. When the contrast becomes severe, do not automatically flatten it with fill. Place the subject so that a snowbank, pale wall, or open sky lifts the shadow side naturally, then reserve black cloth or a solid flag for moments when the face needs stronger separation.
- Scout the location at the actual planned shooting hour, not merely during a general daylight visit.
- Use side light to reveal facial and environmental texture, and backlight to create silhouettes, rim light, and airborne atmosphere.
- Carry a lens hood, compact flag, and variable or fixed ND filters so composition does not have to surrender to the sun.
- Record exposure and white-balance references, particularly when moving between warm direct light and cool reflected snow.
The Blue Hour Palette and Polar Twilight
When the sun drops below the horizon, winter does not become instantly black. In places experiencing polar night, the sun can approach the horizon closely enough to create several hours of pastel illumination around the middle of the day. The landscape may hold a muted blue foundation while the horizon carries lavender, rose, or apricot tones. Snow remains visible, but its brightness is softened and its color becomes unusually responsive to the sky above it.
For filmmakers, twilight is best understood as a sequence of usable states rather than a single visual effect. Civil twilight offers the strongest residual daylight and usually retains recognizable detail in the landscape. Nautical twilight is darker, with more pronounced color in the sky and less reliable ambient exposure. Astronomical twilight approaches night, though the horizon may still carry a subtle gradient before the sky becomes suitable for truly dark-sky imagery. The precise progression depends on latitude, date, elevation, cloud cover, and atmospheric conditions. A clear explanation of these phases is available through this guide to civil and nautical twilight.
That progression can be organized into a practical micro-budget shooting day. Civil twilight is suited to movement, dialogue, and wide landscape shots. Nautical twilight favors stillness, silhouettes, distant lights, and controlled compositions in which the loss of detail becomes expressive. Astronomical twilight can support stars or aurora when conditions permit, but it demands stronger stabilization, higher sensitivity, longer exposures, or carefully chosen movement. A compact, stabilized camera may reduce the need for a tripod, yet stabilization does not remove the need to protect batteries, monitor focus, and test motion rendering before the decisive take.
| Light state | Visual character | Useful dramatic application |
|---|---|---|
| Civil twilight | Soft residual daylight with readable terrain | Dialogue, walking scenes, broad establishing frames |
| Nautical twilight | Deeper blue ambience and stronger horizon color | Silhouettes, transitional scenes, isolated practical lights |
| Astronomical twilight | Near-night darkness with limited ambient structure | Stars, aurora, sparse compositions, heightened isolation |
Color grading should preserve the hierarchy already present in the location. A colder shadow does not need to become an exaggerated cyan, and a warm horizon can lose its credibility if pushed into artificial orange. The colorist”s role is to connect shots made under changing conditions, maintain skin-tone integrity, and shape the emotional temperature of a sequence. In a festival film, restraint often gives the blue hour greater authority than aggressive stylization.
Mastering the Giant Reflector Beneath Your Feet
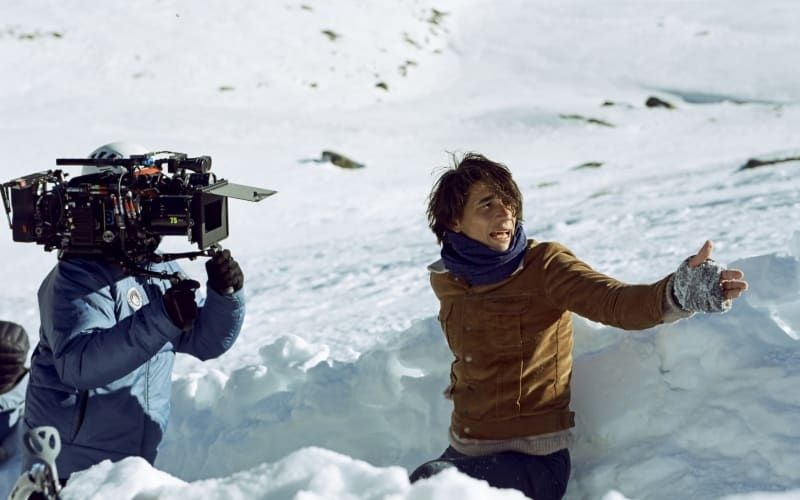
Fresh snow is not neutral ground. It can return a substantial portion of incoming light toward the camera and the underside of a subject”s face, effectively turning the terrain into a vast bounce source. A person standing in an open snowfield may be lit from above by the low sun and from below by a pale, diffuse reflection. This can soften eye sockets and jaw shadows, reveal detail beneath hats and hoods, and create a strangely suspended quality in the frame.
The same property can quickly become excessive. High environmental albedo can turn a valley into an uncontrollable bounce source, as described in this overview of surface reflectivity and albedo. Snow can lift the shadow side until faces appear flat, especially under overcast skies when the entire landscape acts as a broad light field. Instead of adding more illumination, restore shape with negative fill. A black flag, dark coat, vehicle door, or carefully placed solid can absorb reflected light on one side of the subject while preserving the natural ambience elsewhere.
Exposure requires deliberate judgment because a meter confronted by a broad white landscape may prioritize the snow and underexpose the face, or may render snow as a featureless mass if the operator compensates too aggressively. Use a gray card or a known skin-tone reference when possible, monitor false color or waveform data, and protect highlights without treating every bright snow patch as a failure. RAW capture provides more room for recovery, but it cannot reliably restore detail that has been clipped across an entire white field. Exposure tests should include the actual wardrobe, because black wool, pale fur, reflective goggles, and red parkas all alter the visual balance.
- Begin with the snow as a natural bounce card, then add negative fill only where facial contour or separation requires it.
- Keep a white bounce card available for shaded faces, but avoid placing it so close that the image loses the environment”s natural falloff.
- Use a matte box, polarizing filter where appropriate, and careful angle changes to manage glare from ice crystals and hard-packed snow.
- Check highlight detail on both the face and the ground, since a correct portrait exposure can still destroy the narrative geography of the landscape.
Tactical Field Discipline for Independent Crews
The independent winter package should be light enough to move quickly and robust enough to survive exposure to cold, wind, and moisture. Instead of building the plan around large HMI units, prioritize negative fill, compact diffusion, small bounce cards, clamps, lightweight stands, and weather-resistant covers. A five-person crew can often achieve more by relocating a subject two meters, rotating a camera, or raising a black flag than by attempting to overpower the environment with a fixture.
Preparation is also a form of lighting control. Scout the blocking and background before the cast arrives, identify where the sun will cross the frame, and decide which shots require civil twilight, nautical twilight, or full darkness. The most successful natural-light sequences are rarely improvised at the last minute. They are designed around the movement of the sky, with coverage priorities ranked according to how quickly the available light will disappear.
- Confirm the sun path, cloud forecast, wind direction, snow conditions, and usable twilight windows before the crew leaves base.
- Pre-light through positioning rather than equipment. Mark the subject”s standing points and camera lanes so the key direction remains consistent across takes.
- Capture the most time-sensitive wides and moving shots first, then move toward close-ups that can be adjusted with negative fill or a compact diffuser.
- Keep spare batteries insulated and rotate them before they become fully cold. Store the active battery close to the body when possible, while avoiding condensation during transitions.
- Protect cameras and lenses when moving between heated interiors and freezing exteriors. Allow equipment to acclimatize gradually inside a sealed bag to reduce condensation risk.
- Review takes for focus, motion blur, exposure, and flare immediately. A beautiful winter frame may be impossible to recreate once the short light window has passed.
Power management deserves the same attention as composition. Cold reduces battery performance, and repeated monitoring can drain a small setup faster than expected. Carry more charged batteries than a temperate shoot would require, keep charging systems organized, and minimize unnecessary screen brightness without compromising focus checks. Memory cards, cables, filters, and lens cloths should be accessible with gloves. A crew that cannot change a battery or clear frost quickly will lose more daylight than a crew lacking another light.
Crafting Poetic Cinema in the Frozen Wild
High-latitude winter rewards filmmakers who treat weather and geography as collaborators. Raking sunlight can define a character without a visible source. Twilight can stretch a moment between day and night until the scene feels psychologically unmoored. Snow can illuminate a face, flatten it, or overwhelm it, depending on the position of the camera and the discipline of the negative fill. These are not generic outdoor images. They carry the conditions of a particular place.
For independent directors and cinematographers, the strongest strategy is not to imitate a large production”s control but to develop a more attentive form of control. Plan around the sun, protect the equipment, expose with intention, and allow the cold palette to remain legible. The resulting film may find warmth in a small practical light, a face turned toward the horizon, or the faint color held in snow after sunset. In the northern image, restraint is not a lack of ambition. It is the craft that lets the frozen wild speak.